Pages

Friday, 11 May 2012

Recipe: Soft Pretzels

This recipe is easy and simple, but for some reason it took me forever to make these pretzels, could have been because it was my first time making them. When I was a teenager, way back when, I use to work at a movie theater and one of our kiosks sold these kind of pretzels. The whole time I was making them I was thinking "oh this brings back memories". I was really hoping the taste would be similar, it wasn't - it was the same! I am so happy I found this recipe, I use to eat these all the time on lunch break, not very healthy I know, but ooooh so tasty. This pretzel tastes slightly sweet without any toppings or dip, so if you want to add savoury toppings or a salty dip to your pretzel I would cut out some of the sugar.


This is what the pretzels look like naked, I brushed melted butter on them and added cinnamon and sugar with cream cheese icing drizzled over top.

Ingredients:
4 teaspoons active dry yeast
1 teaspoon white sugar
1 1/4 cups warm water (110 degrees F/45 degrees C)
5 cups all-purpose flour
1/2 cup white sugar
1 1/2 teaspoons salt
1 tablespoon vegetable oil
.....
1/2 cup baking soda
4 cups hot water

Directions:
In a small bowl, dissolve yeast and 1 teaspoon sugar in warm water. Let stand until creamy, about 10 minutes.
In a large bowl, mix together flour, 1/2 cup sugar, and salt. Make a well in the center; add the oil and yeast mixture. Mix and form into a dough. If the mixture is dry, add one or two tablespoons of water. Knead the dough until smooth, about 7 to 8 minutes. Lightly oil a large bowl, place the dough in the bowl and turn to coat with oil. Cover with plastic wrap and let rise in a warm place until doubled in size, about 1 hour.
Preheat oven to 400 degrees F. In a large bowl, dissolve baking soda in hot water.
When risen, turn dough out onto a lightly floured surface and divide into 12 equal pieces. Roll each piece into a rope and twist into a pretzel shape. Once all of the dough is all shaped, dip each pretzel into the baking soda solution and place on a greased baking sheet. Sprinkle with whatever you like.

Enjoy!!!

Tuesday, 20 March 2012

Recipe: Broccoli Baked Mac and Cheese


Ingredients:
1 cup of macaroni
1 cup broccoli (chopped up)
1 1/2 cups grated cheddar cheese
3 tbsp flour
1 tsp salt
1 tsp pepper
2 tbsp butter (melted)
2/3 cup bread crumbs


Directions:
Cook macaroni in salted boiling water until soft. Drain well.
Grease a large shallow casserole dish and set aside.
In a bowl mix together cooked and drained macaroni, broccoli, 3/4 cup of cheese, flour, salt and pepper. Place mixture in the casserole dish and cover with remaining cheese. 
Mix melted butter with bread crumbs and sprinkle on top of macaroni.
Bake at 350° for 40 minutes.

Enjoy!!!

Sunday, 18 March 2012

Organizing My Husband's Workspace

My husband is away travelling right now, and as much as I miss him, this has been the perfect opportunity to purge and organize his work space. It's hard to believe looking at the picture below that he actually was able to work here and knew where everything was. I've been told all tech workers are like this, but it still seemed a little too much to me. 


The picture above is from about a month ago, a few things were organized by my husband before he left, so I shouldn't take all the credit, but it still took me three days to get it from close to that to this:


I love my husband very much, but if his desk gets messy again I think I may have to kill him. 

Thursday, 15 March 2012

Leftovers Recipe: Creamy Spinach Dip Baked Pasta

In my last post I made some creamy spinach dip, well I realised I made just too much for the amount of people in our home right now and it was getting a little repetitive. I only had about half the amount of spinach dip left when I used it in this recipe, so keep in mind, what I made here is a relatively small amount and you may need to double up this recipe to satisfy everyone's stomach. 


Ingredients:
Creamy spinach dip (click here for the recipe)
1 1/2 cups of bow tie pasta (or 1 cup of macaroni)
1 cup shredded mozzarella
1 tsp butter


Directions:
Cook pasta according to directions on the box until soft. Drain well.
Using the butter grease a shallow casserole dish and set aside.
Take the cooked pasta and stir in the spinach dip and half the mozzarella cheese. Place in the casserole and sprinkle with the remaining cheese.
Bake at 400° for 15 minutes.


Enjoy!!!

Tuesday, 13 March 2012

Recipe: Creamy Spinach Dip


I love snack foods. I sometimes replace lunch with various types of snack foods, which, (hanging my head in shame) is really bad. Nonetheless, I thought I'd share a current favourite snack food of mine, a creamy and delicious spinach dip. 

Ingredients:
1/2 cup onion
1 1/4 cups washed and thoroughly drained spinach 
1/2 cup softened cream cheese
1/2 cup sour cream
sprinkle of cayenne pepper
1 tsp salt
1 tsp pepper
2 tsp garlic salt


Directions:
Chop up the onion and spinach and set aside. 
In a small mixing bowl, bring together all other ingredients using an electric mixer. 
Spoon in chopped spinach and onions, stir in well until combined. 
Let the dip sit in the fridge for a few hours before serving.

Enjoy!!!

Sunday, 11 March 2012

DYI: Glass Cleaner


There are many reasons to start making your own household cleaning products, be it environmental reasons, financial reasons....really any reason. Although, no matter what the reason may be, we all still want products that work well. I think I have it, this might possibly be the best homemade glass cleaner ever. This recipe comes straight from Crunchy Betty, all I did was alter the measurements a teeny bit to fit in my spray bottle. Try it, it works great!

Ingredients:
1/5 cup vinegar
1/5 cup rubbing alcohol
1 tbsp cornstarch
1 1/2 cups warm water 

Direction:
Pour all the ingredients into a spray bottle and shake well. Voila, homemade glass cleaner.

Friday, 9 March 2012

Recipe: Crock Pot Apple Butter


This is my favourite crock pot recipe, I love absolutely anything with apples in it. My kids eat this mixed in with yogurt, on top of waffles and I'm sure they wouldn't mind having it straight out of the jar either. It uses minimal ingredients, doesn't require much effort and tastes great. When it comes to recipes, what else is better than that?!


Ingredients:
1 dozen apples, peeled, cored, and cut into small pieces (I used red delicious)
1/2 cup Water
1/3 cup brown sugar
1 teaspoon cinnamon
1 teaspoon all spice
1/2 teaspoon nutmeg


Take the cut up apples place them in the crock pot or a large bowl and coat them with the brown sugar, all the spices and water, mix well and turn the cock pot dial to the lowest setting. 


Cover and let sit for 5-7 hours....really the longer the better. 


Use a blender to make it a smooth apple butter (which is what I did) or leave it as is.


Jar it and enjoy!!!

Wednesday, 7 March 2012

Health Food Review: Bolthouse Green Goodness


From the website: "Bolthouse Farms® Green Goodness® starts with wheat grass, spirulina, spinach and blue-green algae. We add apples, kiwis, mangos, bananas, pineapples and dragon fruit to make it a good source of iron and Vitamin B6, naturally rich in Vitamins A, C, and B12, and packed with powerful phytonutrients found in nature's most nutritious greens.
  • Blend of 8 delicious juices/purees.
  • Packed with 14 powerful nutrients delivering unmatched healthy green phytonutrients.
  • No preservatives and nothing artificial.
  • Flash pasteurized and cold-filled for longer shelf life and superior nutrition.
  • 100% Juice, 100% Natural and no sugar added.
  • Gluten free."


The colour of this drink can understandably put anyone off, but once you take that first sip, you will soon become addicted. Although this juice contains many kinds of potent vegetables, the first thing I noticed was the taste of tart apples, the drink is overall very sweet, but that doesn't hide the tart taste.
This drink tastes more like it is a fruit juice concoction and not a fruit and vegetable juice mixture, although the slight vegetable taste will be stronger for those who are new to these types of drinks. This juice is more like a smoothie rather than a juice, but does not have a gritty texture. As well, one cup of this juice is pretty filling, I wouldn't use this juice as a meal replacement, but drinking one cup of this instead of eating a chocolate bar would leave you feeling physically more satisfied, while consuming less calories. What really makes this juice worth drinking is the amount of vitamins and minerals even one serving contains, as shown below. 
At the end of the day this juice is just good, I don't find it to be spectacular, it's tastes good, but there are also better tasting juices out there that have the same nutritional value and similar vitamin and mineral content. 


Monday, 5 March 2012

Organizing the Pantry

Our pantry has needed a little love and attention for a while, so I finally got around to doing some organizing. Although there is a vast improvement, I'm not 100% happy with how it looks now, I think I'll let some of the food whittle down a bit and go from there. Here are some before and after pictures, just in case it's hard to tell the before is on the right, while the after is on the left.

Canned and baking goods before, become canned, soup and baking goods after.


From the top to bottom: baking goods, pasta related items and baking items that are sealed. Notice how I used some old baby wipe containers as risers, pretty ingenious eh? Well maybe not.

I have no idea what to do with this pantry, all I know is that I want to change it. Add some more shelves in between the existing shelves? Paint the Shelves? Some thing's in store for this pantry. 

Sunday, 4 March 2012

Today's Great Deal: Thrift Store Shopping

My family and I went thrift store shopping today, I think we've gone so much lately that we've really gotten all we can get for the time being. There are really only a few other things I'm looking to pick up that is second hand, but have had no luck finding them. Garage sale season is coming up shortly, so I'm thinking I'm going to take a second hand shopping break until then.


Today we went to Talize where all blue ticketed items were 50% off, unfortunately the blue ticketed items were few and far between. From Talize I bought a shirt/dress, can dispenser and camping pan. After that, we went to this little thrift store, I can't remember the name of it but all the proceeds go to the Surrey Memorial Hospital, where we picked up the jars, jar accessories, salad spinner and mini cake pan. Considering we spent just over $15.00 for everything it wasn't at all a bad trip.

Friday, 2 March 2012

Recipe: Old Fashioned Pectin Free Strawberry Jam

I'm sure just about everyone knows how to make pectin free strawberry jam, but since there was a point in my adult life when I didn't, I'm making a recipe post for all others out there that mirror the younger version of me in the this department.


Ingredients:
8 cups of whole strawberries 
6 cups of sugar
1/4 cup lemon juice


Directions:
-Set the stove to low-medium (on a 1 to 10 dial I use a 3).
-Rinse and drain the strawberries and place in the a large pot. Add sugar and lemon juice to the pot and gently stir together. 
-Take a fork and press the strawberries against the pot as everything starts to heat up. Stir occasionally and let the jam come to and stay at a boil. Leave on the stove for at least an hour, or until you get the desired thickness and then place in jars.


Enjoy!!!

Wednesday, 29 February 2012

Decorating a Cash Box


This cash box above doesn't look very pretty does it? I think the only thing I find attractive about it is the money inside. Well recently I picked up one of these old boring cash boxes at a thrift store for $3.00. I wish I would have taken a before picture, because the thing was not only boring to look at but mine seemed like it was uglier than the average cash box. 


After a few moments of thought the solution came to me, I decided I was going to spay paint a stencil pattern on it. I've never spray painted anything in my life and thought it would be easy enough. I didn't sand the box down before hand, which wasn't a terrible mistake, but would have made things a lot easier had I done so. Patches of gray kept creeping through and every time the paint dried I had to do touch up after touch up, I'm pretty sure this box has about five coats of paint on it. 


While going through the whole spray painting process I had pretty much thought that I had ruined the box, and couldn't wait for it to dry so I could assess the damage. However, after all was said and done, it just so happens that I'm pretty happy with how it turned out. It's not prefect, but I think it's pretty funky. I might just do this again if I ever come across another boring gray cash box. 


Monday, 27 February 2012

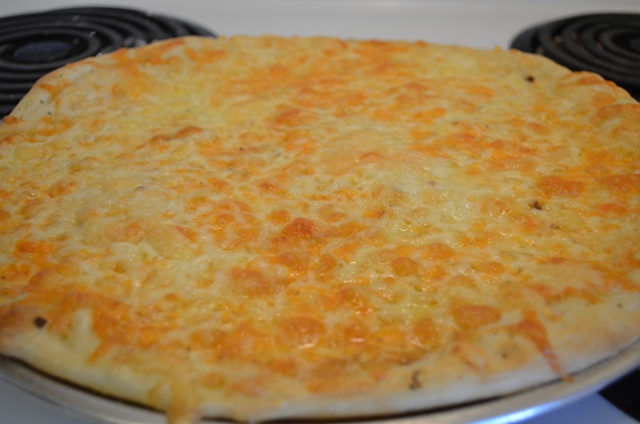
Recipe: Ooey Gooey Cheesy Garlic Bread


*WARNING* These are delicious, ooey, gooey and very bad for you. You may be tempted to eat the whole tray and I have no doubt you will, these are highly addictive.


Dough Ingredients:
1 cup warm water (110 degrees)
2 1/4 teaspoons active dry yeast
1 tablespoon sugar
2 teaspoons salt
2 tablespoons olive 
3 cups all purpose flour

Topping Ingredients:
-garlic butter
- lots of mozzarella and cheddar cheese


Directions:
In a cup or small bowl, stir yeast and sugar into warm water. Let sit for 10 minutes (until bubbles form and mixture starts to foam). In a large bowl add in salt, oil and half the flour and then add the yeast mixture.


Once that first half of the flour is incorporated, start adding flour in bit by bit until you get the pizza dough to the consistency you want. The dough should be smooth and easy to work with, but still a little bit tacky. Lightly grease the bowl & the dough so it doesn't dry out, cover with a clean damp cloth and let it rise for 1-2 hours. 


Once the dough has risen preheat the oven to 375 degrees.


Grease pan with butter and spread pizza dough out evenly onto the pan.


Spread the garlic butter over the dough and top with lots of mozzarella and cheddar cheese. 


Bake 15-20 minutes or until bubbly and golden. Remove from oven and cool 1-2 minutes before cutting.


Enjoy!!!

Saturday, 25 February 2012

How We Save and Spend

My husband and I use to be poor, so poor that we couldn't afford to buy cheese for the first two years of our marriage and had to be really creative when planning a date. I remember a time when I was the only one working, sometimes I'd come home from work sobbing my eyes out because I was only given 20 hours to work that week. Those were hard times, and I honestly think we suffered way more financially then we really had to. There are however more ways to save money now, than ever before. I could talk all day about how to save money and live a better life, but for the sake of putting my thoughts into one entry I'll just list off a few things.

1) Use Coupons! - These things are everywhere (especially for you Americans). You can find coupons in newspapers, order them online and have them mailed to your door, print them out from your computer, call up your favourite company rave about their products and see if they will send you coupons....etc. Coupons are no longer just for food and deodorant, you can get coupons for museums, attractions, oil changes and the list goes on. Using coupons was our first step in saving money, over time it really makes a difference.

2) Getting Cheap Clothing - For our children there are a few different things we do to save money on clothing. We go to thrift stores, kids swap meets (which for us seem to give us more for a lot less than the thrift store) and go to the many garage sales in the summer. If we need something that we weren't able to find second hand or just want to buy a few new items for the kids we go to Gymboree when they are having one of their many sales (their quality is amazing, almost guaranteeing it will be passed down from oldest to youngest), Old Navy and GAP clearance sections and every other store on boxing day. My husband and I don't go through clothes nearly as fast as two toddlers, but we have the same shopping habits when it comes to buying clothes (generally), we just do it less frequently.

3) Saving Money at the Grocery Store - Besides using coupons there are other ways to get a deal at the grocery store. Many times food that is about to expire either that day or the next has a 30-50% off sticker on it. If you have a freezer (which I highly recommend and many times can be obtained free from craigslist) you can throw so many things in it. Milk freezes well, so does cheese, butter, bread.....etc, there is no reason to pay full price for these things all the time. Ask the manager or supervisor when your grocery store does their markdowns so you can be there to catch the good stuff (assuming you're like me and don't have a paying job).

4) Vacations - I love vacations, although who doesn't?! Since we are not rolling in cash we have to be very careful with what we do on our vacations. As it stands now, if we want to go on a vacation every year it means no flying. Plane tickets, airport tax and little things like taxis and buses from spot to spot is just beyond our budget right now, so we do road trips. We save for each vacation starting a year in advance, we may not know where we will be going or for how long, but getting away from it all is incentive enough. All of our coins, well I should be saying my coins since my husband only uses his credit card go in a "vacation" jar, so does the money from bottle returns, any mail in rebates or things we sell on craigslist or at a swap meet. When our kids get a  little older I'd like to take them to Disney Land, I don't know if our financial situation will improve or God forbid get worse so I'm saving now, not in the way of money, but in airmiles. Airmiles is a great rewards program, it's free to join and lately more and more stores are apart of the airmiles program including Toys r Us and Michaels.

I think because I still have so much more to write, I will be doing a "how we save and spend" part two and possibly even part three and four. Nonetheless, these are some of the things we do to save so we are able to spend.

Friday, 24 February 2012

Recipe: Healthy Kale Pizza


Dough:

Ingredients:
1 (.25 ounce) package active dry yeast
1 cup warm water (110 degrees F/45 degrees C)
1 1/2 cups all purpose flour
1/2 cup buckwheat flour
1/4 cup flax seeds
1/5 cup ground chia
2 tablespoons olive oil
1 teaspoon salt
2 teaspoons white sugar


Directions:
In a small bowl, dissolve yeast in warm water. Let stand until creamy, about 10 minutes.
In a large bowl, combine both types of flour, ground chia, flax seeds, olive oil, salt, white sugar and the yeast mixture; stir well to combine until a stiff dough has formed. Cover and rise until doubled in volume, about 30 minutes. Meanwhile, preheat oven to 350 degrees F (175 degrees C).


Toppings:
Pizza sauce or something similar, I used Hunt's tomato paste.
Kale, washed and and dried as much as possible, if you have a salad spinner use it.
2 cups of shredded mozzarella cheese.


Turn dough out onto a well floured surface. Form dough into a round and roll out into a pizza crust shape. Cover with sauce and toppings and bake in preheated oven until golden brown, about 20 minutes.


Enjoy!!

Wednesday, 22 February 2012

Decorating Light Switch/ Electrical Outlet Coverings

The standard light switch and electrical plate covers that come with every rental suite are always a boring and drab beige. I've been wanting to liven up our bedroom for a while, but didn't want to spend a whole lot of money on doing so. This idea came to me from Pinspire, it's easy to do and I'm very happy with the results, little touches sometimes make the biggest impact. 


I chose a lovely damask purple, that goes well with our solid purple bedding.


For this project you will need:
- Light switch / electrical plates
- Scissors
- Box cutter
- Acid free adhesive
- A sponge brush
- Mod Podge
- Scrapbook paper


- Take your electrical cover place it on the scrapbook paper, trace the area and cut it out. It's OK it you've cut more than you need, you can cut any excess off later.
- Use the sponge brush and paint the acid free glue onto the electrical cover as well as the paper. Place the paper over the cover and gently smooth out with your fingers. Now let it dry.
- Once everything is set cut any excess paper and cover decorated plate with mod podge, add as any coats as you want, I recommend 4-6. Let dry.
- Now that the mod podge is dried, take your box cutter and cut out all the holes.
- There you have it, some beautiful covers to replace those boring ones!